A Shopify store without e-commerce app integrations is like an athlete without its gear—and email marketing apps are one of the most crucial to manage a successful online store.
And today we’ll talk about possibly the most popular and most feature-rich out of them all—Klaviyo. Namely, how to sync it seamlessly with your Shopify store.
Spoiler alert: it’s a piece of cake.
So let’s quickly move onto the whys and hows then.
💸Can your Shopify store perform better? Identify key areas to improve using our top-notch ecommerce audit calculator.
The Benefits of Connecting Klaviyo and Shopify Accounts
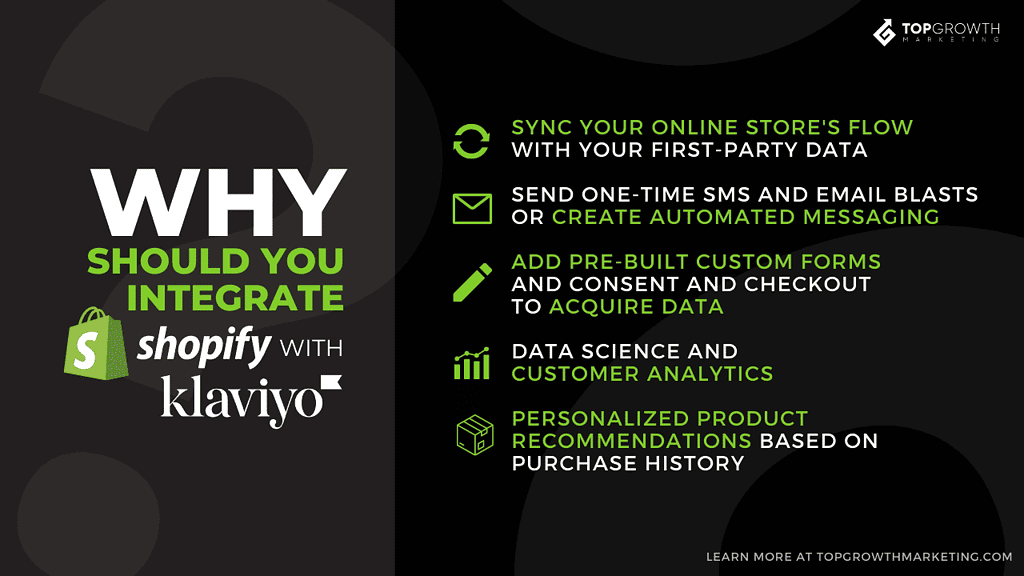
Integrating Klaviyo with Shopify brings a host of benefits, from synchronizing data to leveraging personalized recommendations.
These powerful features empower you to optimize your marketing efforts, deliver personalized experiences, and drive sales for your e-commerce business.
Sync Your Online Store’s Flow With First-Party Data
Unless you’ve been living under Patrick Star’s house, you heard about the terms “privacy-first tracking,” “end of third-party cookies” and so on…
Well, that’s all true. But thanks to first-party data that you collect using Klaviyo, it’s not doom and gloom when it comes to customer acquisition and retention on your store.
By integrating Klaviyo to Shopify, you’ll also sync all of Klaviyo’s flow, including acquired leads with Shopify’s server-side data, which opens up a bunch of awesome promotional possibilities.
For instance, you can always import your high-value customers to an advertising platform and use it to feed that platform’s algorithm with relevant data—which will help it find high-intent customers. A win-win situation.
Send One-Time Blasts Or Create Customer Journeys
Having an one-off super discounted sale? No problem. Send a blast informing all the people on your list and watch the sales pop off.
The same goes for any holiday, special days, milestones, new drops… By having Klaviyo close, you are essentially working on retaining your customers in a couple of clicks.
At the same time, you can nurture “colder” audiences or win back previous customers with a carefully built workflow including, for example, your brand’s story.
Finally, you can separate your audience by segments—target those who abandoned their carts on your store, or send special emails to customers who shop more.
The opportunities are endless!
Add Pre-Built Consent And Lead Gen Forms
With the two platforms, working in sync, lead generation has never been easier.
You can choose some of the pre-built Klaviyo email sign up form templates and add them to your Shopify store instead of building from scratch.
Unlock The Power Of Data Science and Customer Analytics
Klaviyo has a ton of pre-built reports which you can customize to track your most important metrics.
By harnessing the power of both Shopify analytics and Klaviyo analytics, you can always measure accurate data coming from your email marketing campaigns.
Let’s imagine you have a BFCM campaign and you send a blast to all your customers. By using synced analytics, you can see exactly how many shoppers converted after accessing your store via that email. Sounds good, no?
Personalized Product Recommendations
Did you know that you can use feed algorithm to recommend products to your customers?
By leveraging data from Shopify’s product catalog and customer behavior, algorithm can “predict” which items your customers might want to buy—and recommend them.
You can add these recommendations as blocks in your email, with every recipient getting product recommendations depending on their past behavior.
Don’t Forget Smaller Benefits
We often neglect a lot of stuff unitl we need it. Well, due to Shopify and Klaviyo’s collaboration, you won’t even notice that it’s gone.
For instance, customer care teams on both platforms can provide quick and easy answers to your problems as they’re familiar with each other’s tools.
Also, syncing the two platforms allows you to seamlessly use features of both—like using discounts that you create in Shopify in your email flows. Sweet!
When You Should Integrate Klaviyo With Shopify?
It’s simple. If you’re a Shopify merchant and you haven’t set up email automation—what are you waiting for?
And if you did, integrating your automation tool with Shopify is a no-branier.
The main upside of Klaviyo is that it’s both one of the most sophisticated and affordable email automation tools on the market and also stupid simple to integrate with Shopify.
By doing so, you can centralize all your data and just shuffle between the two tools depending on your needs. Also, you should consider the integration if you want to have:
- Set up automated campaigns: Abandoned carts, welcome series, order confirmations, and more using server-side data from Shopify and first-party data from Klaviyo. Nice.
- Leverage advanced segmentation and personalization: Segment your audience based on purchase history, browsing behavior, and demographics, allowing you to send relevant and tailored messages that resonate with your customers.
- Customize your emails: Klaviyo offers a wide range of email templates and a drag-and-drop editor, making it easy to create professional and appealing emails.
- Track in-depth analytics and reporting: Track KPIs like email open rates, click-through rates, and revenue generated from email campaigns. This data enables you to optimize your strategies and make data-driven decisions.
So long story short, consider integrating Klaviyo with Shopify if you want to “unlock” the full potential of your e-commerce email marketing strategy.
How to Integrate Klaviyo With Shopify: Step-by-Step Guide
Adding Klaviyo to your Shopify account should be as simple as it comes.
In fact, there’s actually two methods you can use to sync the two:
- Using the Klaviyo Setup Wizard
- Using Integrations Tab in Klaviyo
So let’s cover both.
How to Add Klaviyo to Shopify Using Setup Wizard
There’s actually two ways to do this.
- By signing up to Klaviyo directly: You can have Klaviyo identify your website by inputting your sender information.
- By using Shopify’s app store: If you add Klaviyo using Shopify’s app store, it will automatically sync all the data when you type your information. But if you still haven’t set up your Shopify account, it will redirect you to Shopify and the sync won’t work.
After you’ve done this, you should just sit back and wait for the Klaviyo to get your branding elements including logos, colors, fonts, social links, and various other rebranding elements.
How to Add Klaviyo to Shopify Using Integrations Tab
Syncic Shopify and Klaviyo by using integrations tab should be a bit more complex, but nevertheless the preferred process for many.
According to Shopify, here’s what you should do:
- Navigate to your Klaviyo account and locate your account name in the lower left corner. Proceed to the Integrations section.
- Locate the Shopify integration and select the option to Add Integration. This action will lead you to the integration settings page.
- Input your Shopify store URL in the mystore.myshopify.com format into the designated field.
- Once the connection to Shopify is established, proceed to configure the onsite tracking feature.
- Enable the Sync your Shopify email subscribers to Klaviyo option. This will ensure that customers who grant email marketing permission during checkout, provide their information, or subscribe through Shopify’s sign-up form are automatically added to Klaviyo. You have the flexibility to choose the desired list for their inclusion.
- Likewise, for SMS marketing, activate the Sync your Shopify SMS subscribers to Klaviyo checkbox.
- To synchronize data between platforms, select the Sync profiles and profile data from Klaviyo to Shopify option. This setting is highly recommended.
- Once you have configured these settings, click the Connect to Shopify button, which will redirect you to your Shopify account or the login page.
- Thoroughly review the permissions and other settings, and upon verification, proceed by clicking the Install app button. This will initiate the synchronization of all Shopify data with Klaviyo and redirect you to your Klaviyo account.
- During a successful data sync with Klaviyo you should notice a green notification saying the sync was successful.
- As the final step, activate the Klaviyo app embed in Shopify to enable onsite tracking. (Find the Onsite Tracking section within the integration settings page. A message will indicate that the Klaviyo app embed requires activation. Click the “View your Shopify add Embed setting” link to adjust the configuration.)
- The setting to enable Viewed Product tracking is already selected by default. Once the app embed is enabled, it will automatically begin tracking the Viewed Product.
- Review the theme settings to ensure that the app embed is activated, then save the changes.
- Return to the Shopify integration settings page in Klaviyo and verify the presence of the blue callout, confirming that the app embed is now enabled.
By completing all these settings, you can be assured that the Klaviyo and Shopify integration is successfully executed with onsite tracking fully functional.
Bonus: Test Your Onsite Tracking
After you’ve synced the two platforms, it’s time to check whether you’ve done it successfully.
Klaviyo’s onsite tracking has two features—Active on Site and Viewed Product tracking.
If you want to confirm whether they’re working correctly, just follow these steps:
- Go to your Shopify site.
- Add the following to the end of the URL on your homepage, replacing [email protected] with your email address: [email protected]
- Refresh the apge
- Go to the product page on your site
- Search in Klaviyo for your email address.
You should see a new Klaviyo profile made for you—if it wasn’t already created before.
Also, you’ll notice that Active on Site and Viewed Product metrics have been tracked on your activity feed.
Bonus #2: How to Monitor Your Data Sync
When you sync the two platforms, Klaviyo will sync the last 90 days of your Shopify data first so you can start creating workflows for the most recent customers.
Afterwards, Klaviyo will start collecting all the historical data—which could take from a few minutes to up for a few days depending on the volume.
So if you want to make sure that the sync is complete, here’s what you should do:
- Go to Analytics dropdown menu and select Metrics.
- Find the Placed Order metric and change the date period of the graph to see which days have been synced.
- When the sync finishes, Shopfiy will notify you by marking the Shopify Integrations complete.
- You can also cross-check total orders for a few days or a week to confirm that all data is synced.
- Make sure your Klaviyo account time zone matches the one in Shopfiy.
- Check your timezone by clicking on your account name on the lower-left and select Settings>Organization. The timezone is at the bottom.
Bonus #3: What Sign-Up Forms You Can Use With Shopify
When you sync the two platforms, you’ll also have three options of syncing your sign-up forms to Klaviyo as well:
- Sync your default Shopify sign-up forms to a Klaviyo list. You can do this by ticking the “Sync your Shopify email subscribers to Klaviyo” option when setting the integration up.
- Add an opt-in form from Klaviyo to your Shopify store
- Use a 3rd party sign-up form provider on your Klaviyo account.
Shopify and Klaviyo: Collect, Blast, Sell!
…and you’ve made it. You’ve connected your Klaviyo workflow with your Shopify store and you’re ready to blast some awesome email campaigns to your readers.
Of course, make sure you’ve set up everything correctly—and don’t forget to test onsite tracking so you don’t miss out on data and potential revenue.
Good luck! And if you need any help setting up your e-commerce tools, don’t hesitate to contact us!


Great guide! I’ve been looking for a way to streamline my email marketing with Shopify, and this integration seems like exactly what I need. The step-by-step instructions are super helpful. Can’t wait to start implementing these strategies! Thank you!
Great guide! I found the step-by-step instructions super helpful. Integrating Klaviyo with Shopify seemed daunting at first, but your clear explanations made it easy to follow. Thanks for sharing!
This guide was super helpful! I had been struggling with integrating Klaviyo with my Shopify store, but your step-by-step instructions made it easy to follow. Thanks for sharing such valuable information!
This guide is super helpful! I’ve been struggling to integrate Klaviyo with my Shopify store, but your step-by-step instructions make it much clearer. Excited to start leveraging email marketing more effectively now. Thanks for sharing!